REVIEW · MUMBAI
Mumbai (Malabar District) Self-Guided Tour
Book on Viator →Operated by Explorial · Bookable on Viator
A walk in Mumbai can feel random, until it isn’t. This self-guided scavenger hunt turns Malabar Hill and nearby sights into a simple route you follow with riddles, photo prompts, and on-site questions that nudge you to look closer. I love that it mixes classic sightseeing with a game-like pace, and it works well even if you like to stop, stare, and snack when you want.
The second thing I like is the structure: you’ll use the app’s map to get from clue to clue, then answer questions where the answers are shown in signs, pictures, and details around each stop. The only drawback to plan for is that the trail can run a bit longer than you expect, so wear comfy shoes and don’t start it when you’re already pressed for time.
In This Review
- Key highlights worth your attention
- How a clue route makes Malabar District easier to enjoy
- Price and what you really get for $7.90
- Start point in Malabar Hill: where you’ll begin and end
- The Explorial-App system: how you’ll play the tour
- Stop 1: Babulnath Temple and your first clue
- Stop 2: Hanging Gardens for puzzles and creative photos
- Stop 3: Girgaon and the Girgaon Chowpatty area finish
- What you’ll learn: questions that point you to visible answers
- Photo tasks: how to make the game part actually fun
- How long it takes (and why the trail might feel longer)
- Getting the most out of a self-guided hunt
- Who this tour suits best
- Should you book this Mumbai scavenger hunt?
- FAQ
- How long is the Mumbai (Malabar District) self-guided tour?
- Is this a guided tour with a person?
- What are the main stops on the route?
- Where do I start the tour?
- Do I need an access code to start?
- What language is the experience in?
- Is the tour limited to a set time window?
- Is public transportation nearby?
- Can I cancel for a full refund?
Key highlights worth your attention

- Explorial-App scavenger hunt format: solve tasks, earn points, and follow clues without a live guide
- Built-in map navigation to help you move between stops at your own pace
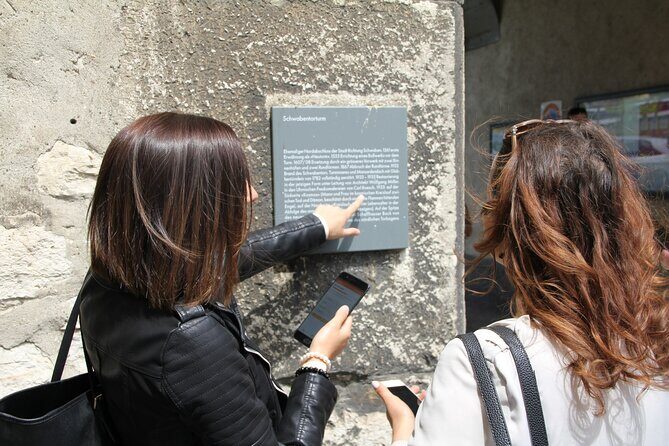
- On-site questions designed so answers are visible at the locations you visit
- Photo tasks that reward creativity, not speed
- Stops that cluster well around Malabar Hill to Girgaon Chowpatty area
- Flexible timing since the experience isn’t limited in time
How a clue route makes Malabar District easier to enjoy
Mumbai can be overwhelming in the best way. Streets feel busy, landmarks can blend together, and it’s easy to spend your sightseeing time trying to figure out what you’re looking at. This experience flips that problem into something fun: you follow a sequence of locations, and each one comes with a task.
The big win here is control. You aren’t locked into a strict group schedule, and you can slow down when you want to. The app nudges you toward specific sights and smaller discoveries by giving you hints first, then questions once you’re standing in front of the real thing.
I also like that the tour doesn’t pretend you’ll learn everything in two hours. It’s more practical than that. You’re given quick prompts that help you notice details you might miss on your own, especially if it’s your first time in India. One review summed it up well: it’s a learning setup that can cover history and religion while still connecting to everyday life like food or festivals.
You can also read our reviews of more guided tours in Mumbai


Price and what you really get for $7.90

At $7.90 per person, this is priced like an add-on, not a big-ticket “tour package.” The real value is that you’re paying for a structured route and an activity layer—clues, tasks, map help, and questions—delivered through your smartphone.
You should think of it less like a guided explanation, and more like a self-paced mission. For the money, you’re not just walking around—you’re solving, checking, and being directed to the next stop. That’s why it feels good for different traveler styles: if you love puzzles, great. If you just want an itinerary that keeps you moving, also great.
Start point in Malabar Hill: where you’ll begin and end
You’ll start at Khadija Tayyabji Road 1, Simla Nagar, Malabar Hill, Mumbai, Maharashtra 400006. The tour ends back at the same meeting point, so you’re not left trying to figure out your way home at the end while your phone battery does the nervous thing.
The stated opening hours are basically wide-open (daylong), which is helpful in a city where weather can shift and you may need flexibility. If you plan well, you can pick a start time that matches your energy level—morning for cooler walking, later for more relaxed sightseeing.
You’re also told it’s near public transportation. That matters because when a walking plan is self-guided, you want easy ways to adjust if you’re running late or want to break off.
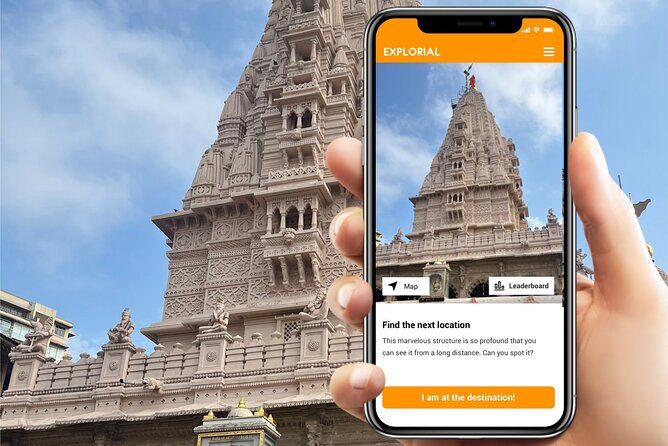
The Explorial-App system: how you’ll play the tour

After you purchase your ticket, you receive an access code. You’ll download the Explorial-App, enter the code, and then start from the meeting point. From there, the tour guides you using your phone:
- A map function helps you navigate to the next location.
- At each stop, you’ll get clues and then tasks.
- You’ll earn points for completing activities, including photo tasks.
This isn’t a “press play and wander” style tour. It’s interactive, and the tasks are meant to keep you moving and looking.
Also important: the experience is not limited in time. You’ll see an average duration of 1–2 hours (with about 2 hours listed overall). That flexibility is a big deal in Mumbai, where you may want a quick stop to rest, grab water, or pause for photos without feeling like you’re failing the schedule.
Stop 1: Babulnath Temple and your first clue
Your first stop is Babulnath Temple. This is a smart opening point because it sets the tone quickly. You’ll arrive, then you don’t just look around—you work. The app will give you a task, usually tied to information you can see around the location (signs, pictures, or details).
Why this works well: you’re forced into active observation. Instead of treating the temple area like a quick photo spot, you spend a few minutes reading and interpreting what’s already there. That’s where the learning part kicks in.
One practical tip: take a breath before you start solving. Early on, it can help to slow down, because you’ll be trying to orient yourself in both the space and the app. Once you get your rhythm, the rest of the trail tends to click.
You can also read our reviews of more tours and experiences in Mumbai

Stop 2: Hanging Gardens for puzzles and creative photos
Next up is Hanging Gardens. This stop is where the experience often shifts from “find and read” to “solve and create,” based on how the tour describes photo tasks and point scoring.
You should expect a mix of:
- clue-based progression (so you know where to look next),
- questions tied to what you can see at the stop, and
- photo challenges that ask for creativity rather than perfect timing.
If you don’t usually take many photos, this is still worth doing. The tasks are there to make you notice angles, details, and moments you’d otherwise walk past. One review pointed out that the clues are challenging but not impossible, and Hanging Gardens is the kind of place where that balance feels fair: you can’t solve it just by guessing, but you also don’t need special knowledge.
The one caution here is footwear and pacing. Gardens and viewpoints can mean slopes and uneven walking. Bring shoes that let you stand comfortably for a few minutes while you figure out the puzzle.
Stop 3: Girgaon and the Girgaon Chowpatty area finish
Your final stop is Girgaon (and the tour overview references Girgaon Chowpatty along the way). This is a great way to end because the vibe often changes at the coastline and in beach-adjacent neighborhoods. You shift from “problem solving at landmarks” to “taking in the setting” while still finishing tasks and answering questions.
Even though the tour ends back at the starting meeting point, the Girgaon segment helps you finish with variety. It’s not just a straight line of sights. You’ll have a transition from temple and garden energy to a more open, social atmosphere.
For your planning: expect this last section to feel like a reward. You’ll likely want to slow down for photos and for whatever snacks or drinks you find nearby. Since the tour isn’t time-locked, you can take that moment without feeling like you’re sprinting to check a box.
What you’ll learn: questions that point you to visible answers
A lot of app tours fail because the questions feel generic or require background knowledge you don’t have. Here, the design goal is different: once you arrive, the answers are usually hidden in things like signs, pictures, or details at the sight.
That changes the experience. You aren’t studying a guidebook. You’re doing a low-stakes scavenger hunt that teaches you by making you look.
And the learning theme can be broad. The tour overview mentions a mix of points of interest and that you’ll learn about sights while also picking up context. One review even highlighted an interesting mix of history and religion with food or festivals. That’s the kind of variety you want in a city like Mumbai, where culture doesn’t stay in museums—it shows up everywhere.
Photo tasks: how to make the game part actually fun
The tour includes photo tasks where you earn points by matching prompts. This can sound gimmicky, but it’s one of the most likely features to make the walk feel memorable.
To get the most from it:
- Don’t overthink it. If the prompt is creative, try something simple and readable in a shot.
- Keep your phone secure while you look around. You’ll be moving, and crowded areas can make phone handling a little tricky.
- If you’re with family or friends, split roles. One person can keep eyes on the clue, another can handle the photo prompt.
One review emphasized that the trail was worth it because it led to places they never knew existed. The photo element often drives that effect because it gives you permission to slow down and pay attention instead of just rushing from one checkpoint to the next.
How long it takes (and why the trail might feel longer)
The experience is listed at about 2 hours, with an average of 1–2 hours. But one detail from lived experience is important: the trail can be a little longer than expected.
So I’d plan like this:
- Start with enough time to finish without stress.
- If you’re doing this on a day packed with other plans, choose a slot earlier rather than later.
- Bring water. Mumbai walking can be deceptive, especially if you stop often for photos and puzzles.
Because the tour isn’t limited in time, you won’t be thrown out when the timer hits zero. Still, your legs will eventually tell you the truth, so comfortable shoes are not optional.
Getting the most out of a self-guided hunt
A self-guided tour succeeds when you treat it like a mission, not a checklist. Here’s how to make it click fast:
- Use the app map function to stay oriented. Don’t rely on memory.
- Read the hints carefully. Hints usually exist because it’s faster to find the right direction than to guess blindly.
- When you reach a stop, pause before you answer. The tour is set up so answers tend to be visible at the location.
- Expect a learning rhythm: hint → find → solve → move.
This format is especially good for travelers who like independence but still want structure. You’re not alone in planning decisions. The app gives you the “next step,” even though you’re the one deciding how long to linger.
Who this tour suits best
This experience fits a specific travel style: people who like to move at their own pace and prefer an activity that keeps them engaged. It also works well if you’re traveling with others who can share the fun of solving.
From what the experience is designed to do, it’s a strong match for:
- first-time visitors who want a playful way to learn landmarks, religion, and city culture,
- families who want shared time without expensive guided pricing,
- puzzle lovers who enjoy hints and questions more than lectures,
- budget-minded travelers looking for a structured walking route.
If you want a step-by-step guided lecture where someone tells you every fact out loud, this may not feel like enough. But if you’re happy to learn through prompts and looking closely, it’s a great fit.
Should you book this Mumbai scavenger hunt?
If you’re the kind of traveler who likes a plan that doesn’t hold you hostage, I’d book it. For under $8, you get a guided-in-spirit route, interactive tasks, and the freedom to stop and breathe. The app-based clues and on-site questions are the heart of the value, and the photo prompts are a nice way to make the walk feel like your own story.
Skip it only if you’re short on time, hate walking longer than you planned, or want a traditional guide-led experience with lots of live commentary. Otherwise, this is a fun, low-cost way to see Malabar District with your brain turned on—and your eyes open.
FAQ
How long is the Mumbai (Malabar District) self-guided tour?
The tour lasts about 2 hours on average, with an average duration listed as roughly 1–2 hours. The experience is not limited in time, so you can take breaks and finish at your pace.
Is this a guided tour with a person?
No. It’s a private, self-guided walking tour using your smartphone and the Explorial-App.
What are the main stops on the route?
The stops listed are Babulnath Temple, Hanging Gardens, and Girgaon.
Where do I start the tour?
You start at Khadija Tayyabji Road 1, Simla Nagar, Malabar Hill, Mumbai, Maharashtra 400006, India.
Do I need an access code to start?
Yes. After you buy the ticket, you receive an access code that you use in the app.
What language is the experience in?
The tour is available in English.
Is the tour limited to a set time window?
No. You can explore at your own pace. The experience is not limited in time.
Is public transportation nearby?
Yes, it is listed as near public transportation.
Can I cancel for a full refund?
Yes. Free cancellation is available up to 24 hours in advance of the experience’s start time for a full refund.